Testing of 12 Watt LED Driver
We are going to test a 12 Watt LED Driver using DTM-1.
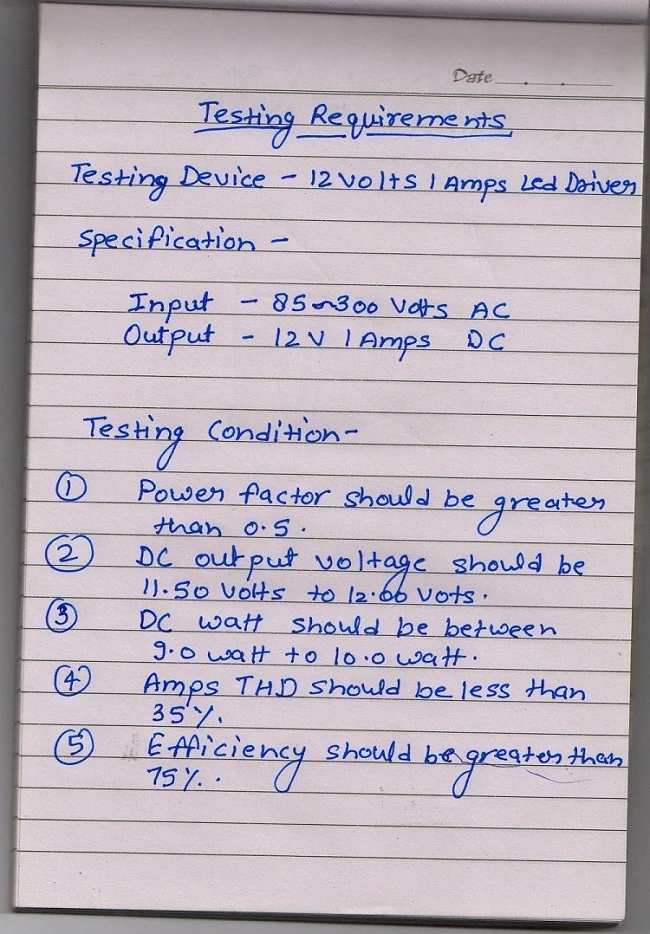
Specification of 12 Watt LED Driver:
- Input: 200~300 Volts AC
- Output: 12 Volts 1 Amps
We have taken a led strip to test this led driver.
We have made the test specification as:

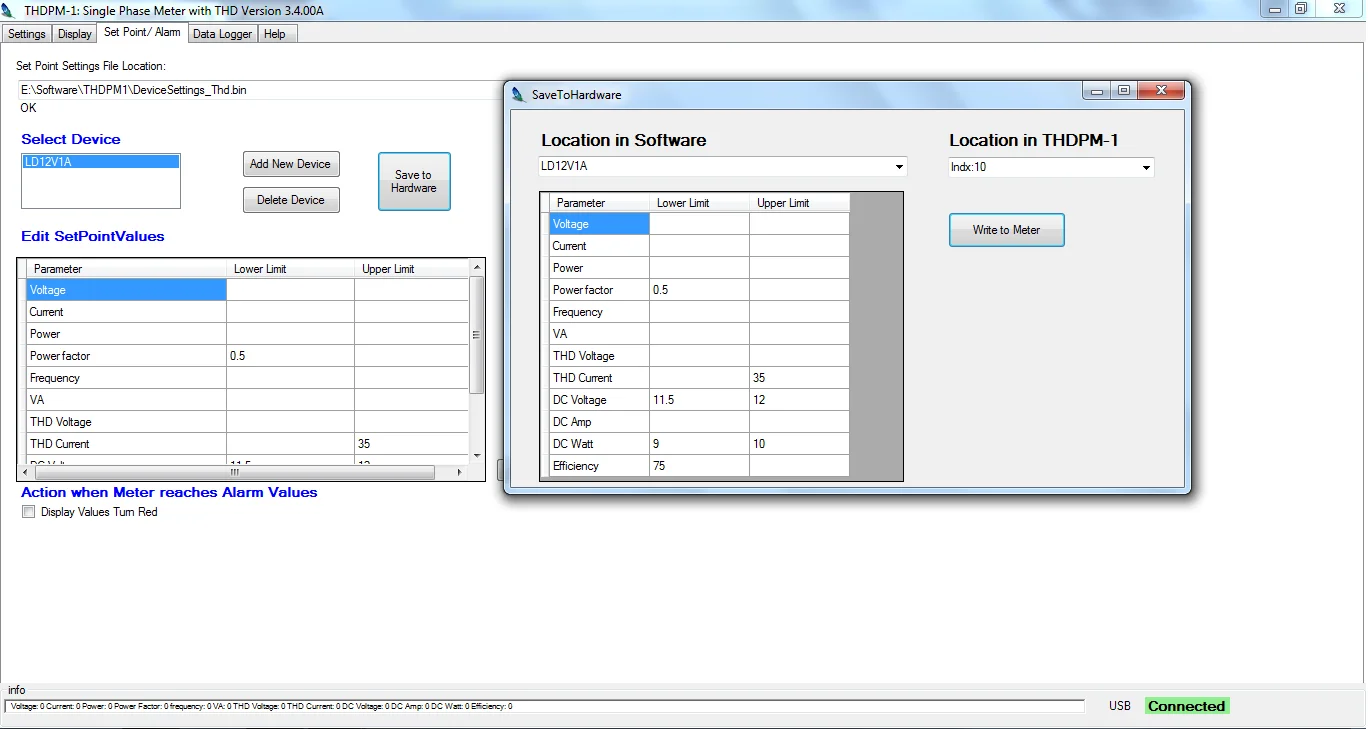
Above specification is set in the DTM-1 Software with model name – LD12V1A
Settings transferred to DTM-1 using Software connection through USB Cable.
In DTM-1 we have selected the model LD12V1A for testing.
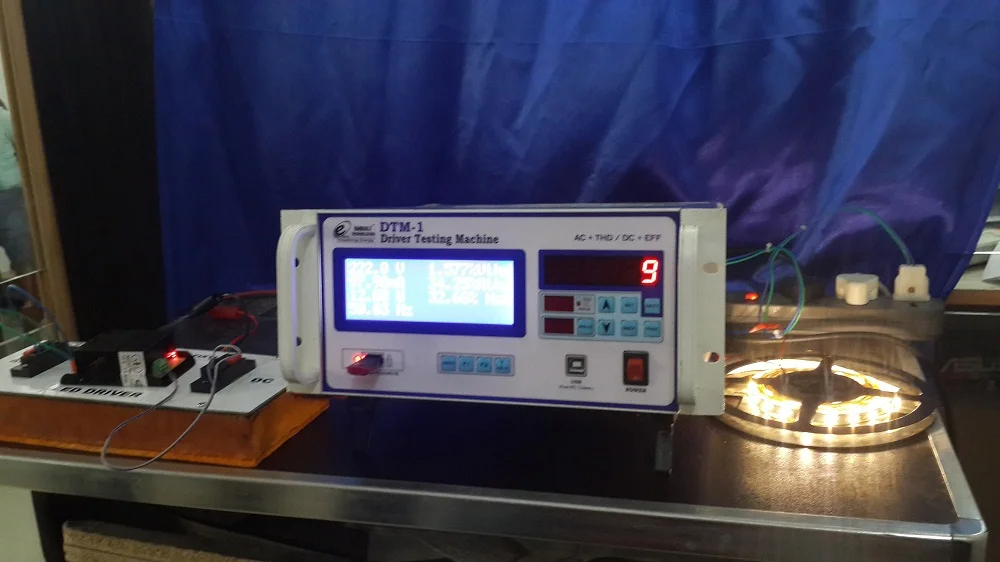
Test Setup
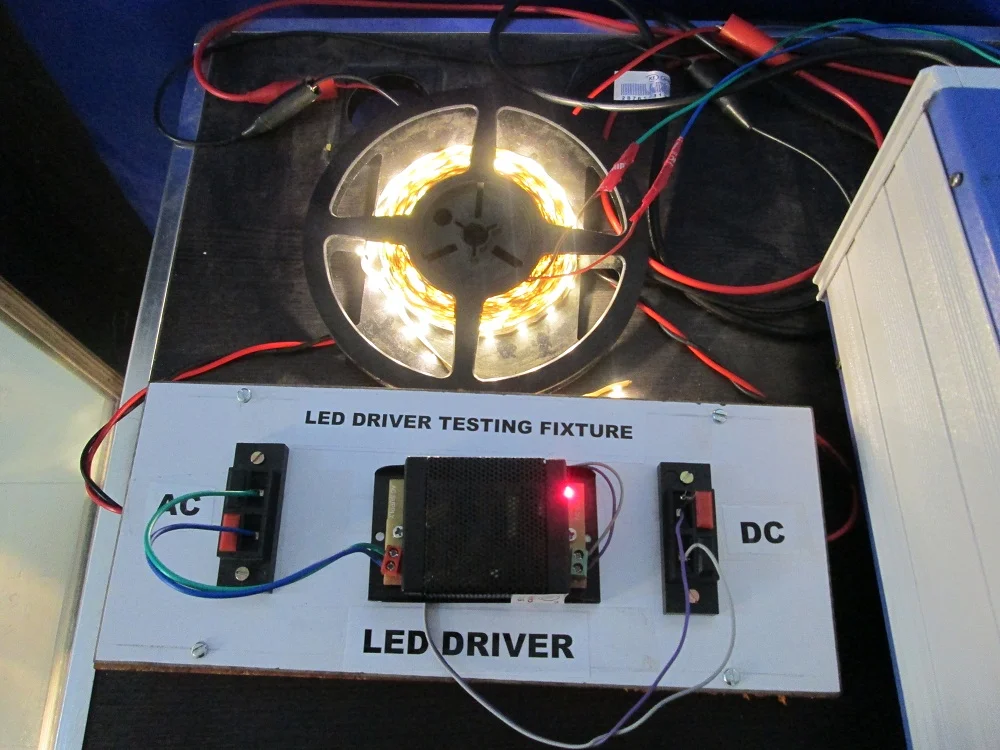
We have made a testing fixture to connect the LED driver for testing. (See below image)
On the DC output load side we have connected a LED Strip.
Pen drive is connected left bottom of DTM-1 which stores production data with model no, serial no and date time.
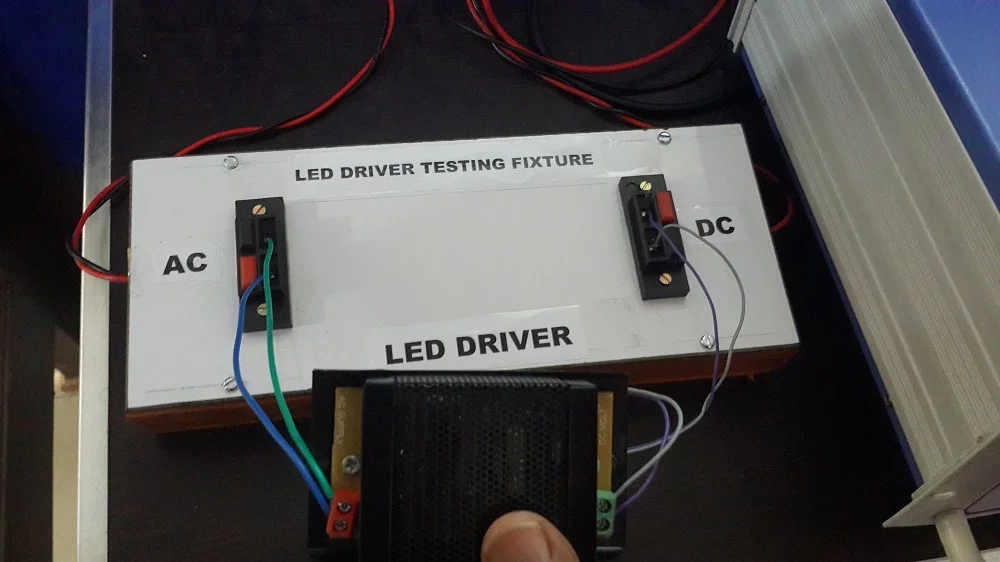
Testing Fixture
Above testing fixture helps user to connect the led driver fast and efficient way.
On one side we have connected the AC output from the DTM-1 and DC Output of LED Driver connected to DTM-1 DC Input using Fixture DC Connector.
Connection
Start from left first AC terminal is connected to the AC Input voltage.
Second terminal AC Output is connected to testing fixture's AC input (LED Driver input).
Third terminal DC Input is connected to the Testing fixture's DC side(LED Driver Output).
Fourth terminal DC output is connected to the load(LED strip).
DTM-1 Readings
Main Page (AC+DC+THD)
On main page we can see the AC Voltage, Current, Watt/PF, Athd%. On second column DC voltage, current, watt and efficiency can be analysed.
On right LED Display serial number is showing for production mode. To write data on pendrive we have to press WRITE button.

AC Parameters
Here we can analyze the AC parameters. It shows AC Voltage Current, Watt, Frequency/PF, Voltage thd%, Current thd%, and NET thd (Athd-Vthd)%
DC Parameters
On this page you can find the DC parameters as DC Voltage, Current, Watt and Efficiency.
On below link you can download production test data as csv file.
We have save the production data in the pendrive so there is no need of computer at the testing table. You can store data on the pendrive and can see on computer/tab/mobile.
We have also done data logging for half an hour.